How to Go from PRD to Multi-Screen UI Flow with AI
Updated March 13, 2026

A product requirements document (PRD) often describes a feature that spans multiple screens, such as a checkout process, onboarding sequence, or account settings flow. Translating these requirements into interface screens usually involves building layouts in a design tool and iterating on them through feedback.
AI design tools like Moonchild can help generate interface screens from written descriptions. By turning a PRD into a set of connected UI screens, teams can visualize a feature earlier and review the structure of the user flow before detailed design work begins.
Structure your PRD as a clear sequence of screens
For this workflow, the PRD should describe the user journey as a sequence of steps or screens.
For example:
User lands on the home screen, selects "Add Item," sees a form, submits the form, receives a confirmation message, and returns to the main screen.
Listing the screens in order helps the system interpret how the interface should be structured.
It is also useful to describe important states in the flow, such as:
- Validation errors
- Loading states
- Confirmation messages
If the PRD includes extensive background or strategic context, focus on extracting the section that describes the user journey and interface states. A concise description of the flow is usually sufficient to generate screens that represent the experience.
Being explicit about state changes can also improve clarity. For example:
When the form is submitted, the system validates the input. If errors occur, inline messages appear. If the submission succeeds, a confirmation message is displayed.
Step 1: Import your design system first
If your team maintains a design system, importing it before generating screens can help ensure visual consistency.
Moonchild supports connecting design systems that include elements such as:
- Typography styles
- Color tokens
- Buttons and interface components
- Layout patterns
When a design system is available, generated screens can reference those predefined elements. If no design system is connected, the generated layouts use default styling.

Step 2: Paste your PRD and generate
After identifying the section of the PRD that describes the feature flow, paste it into Moonchild and generate the interface.
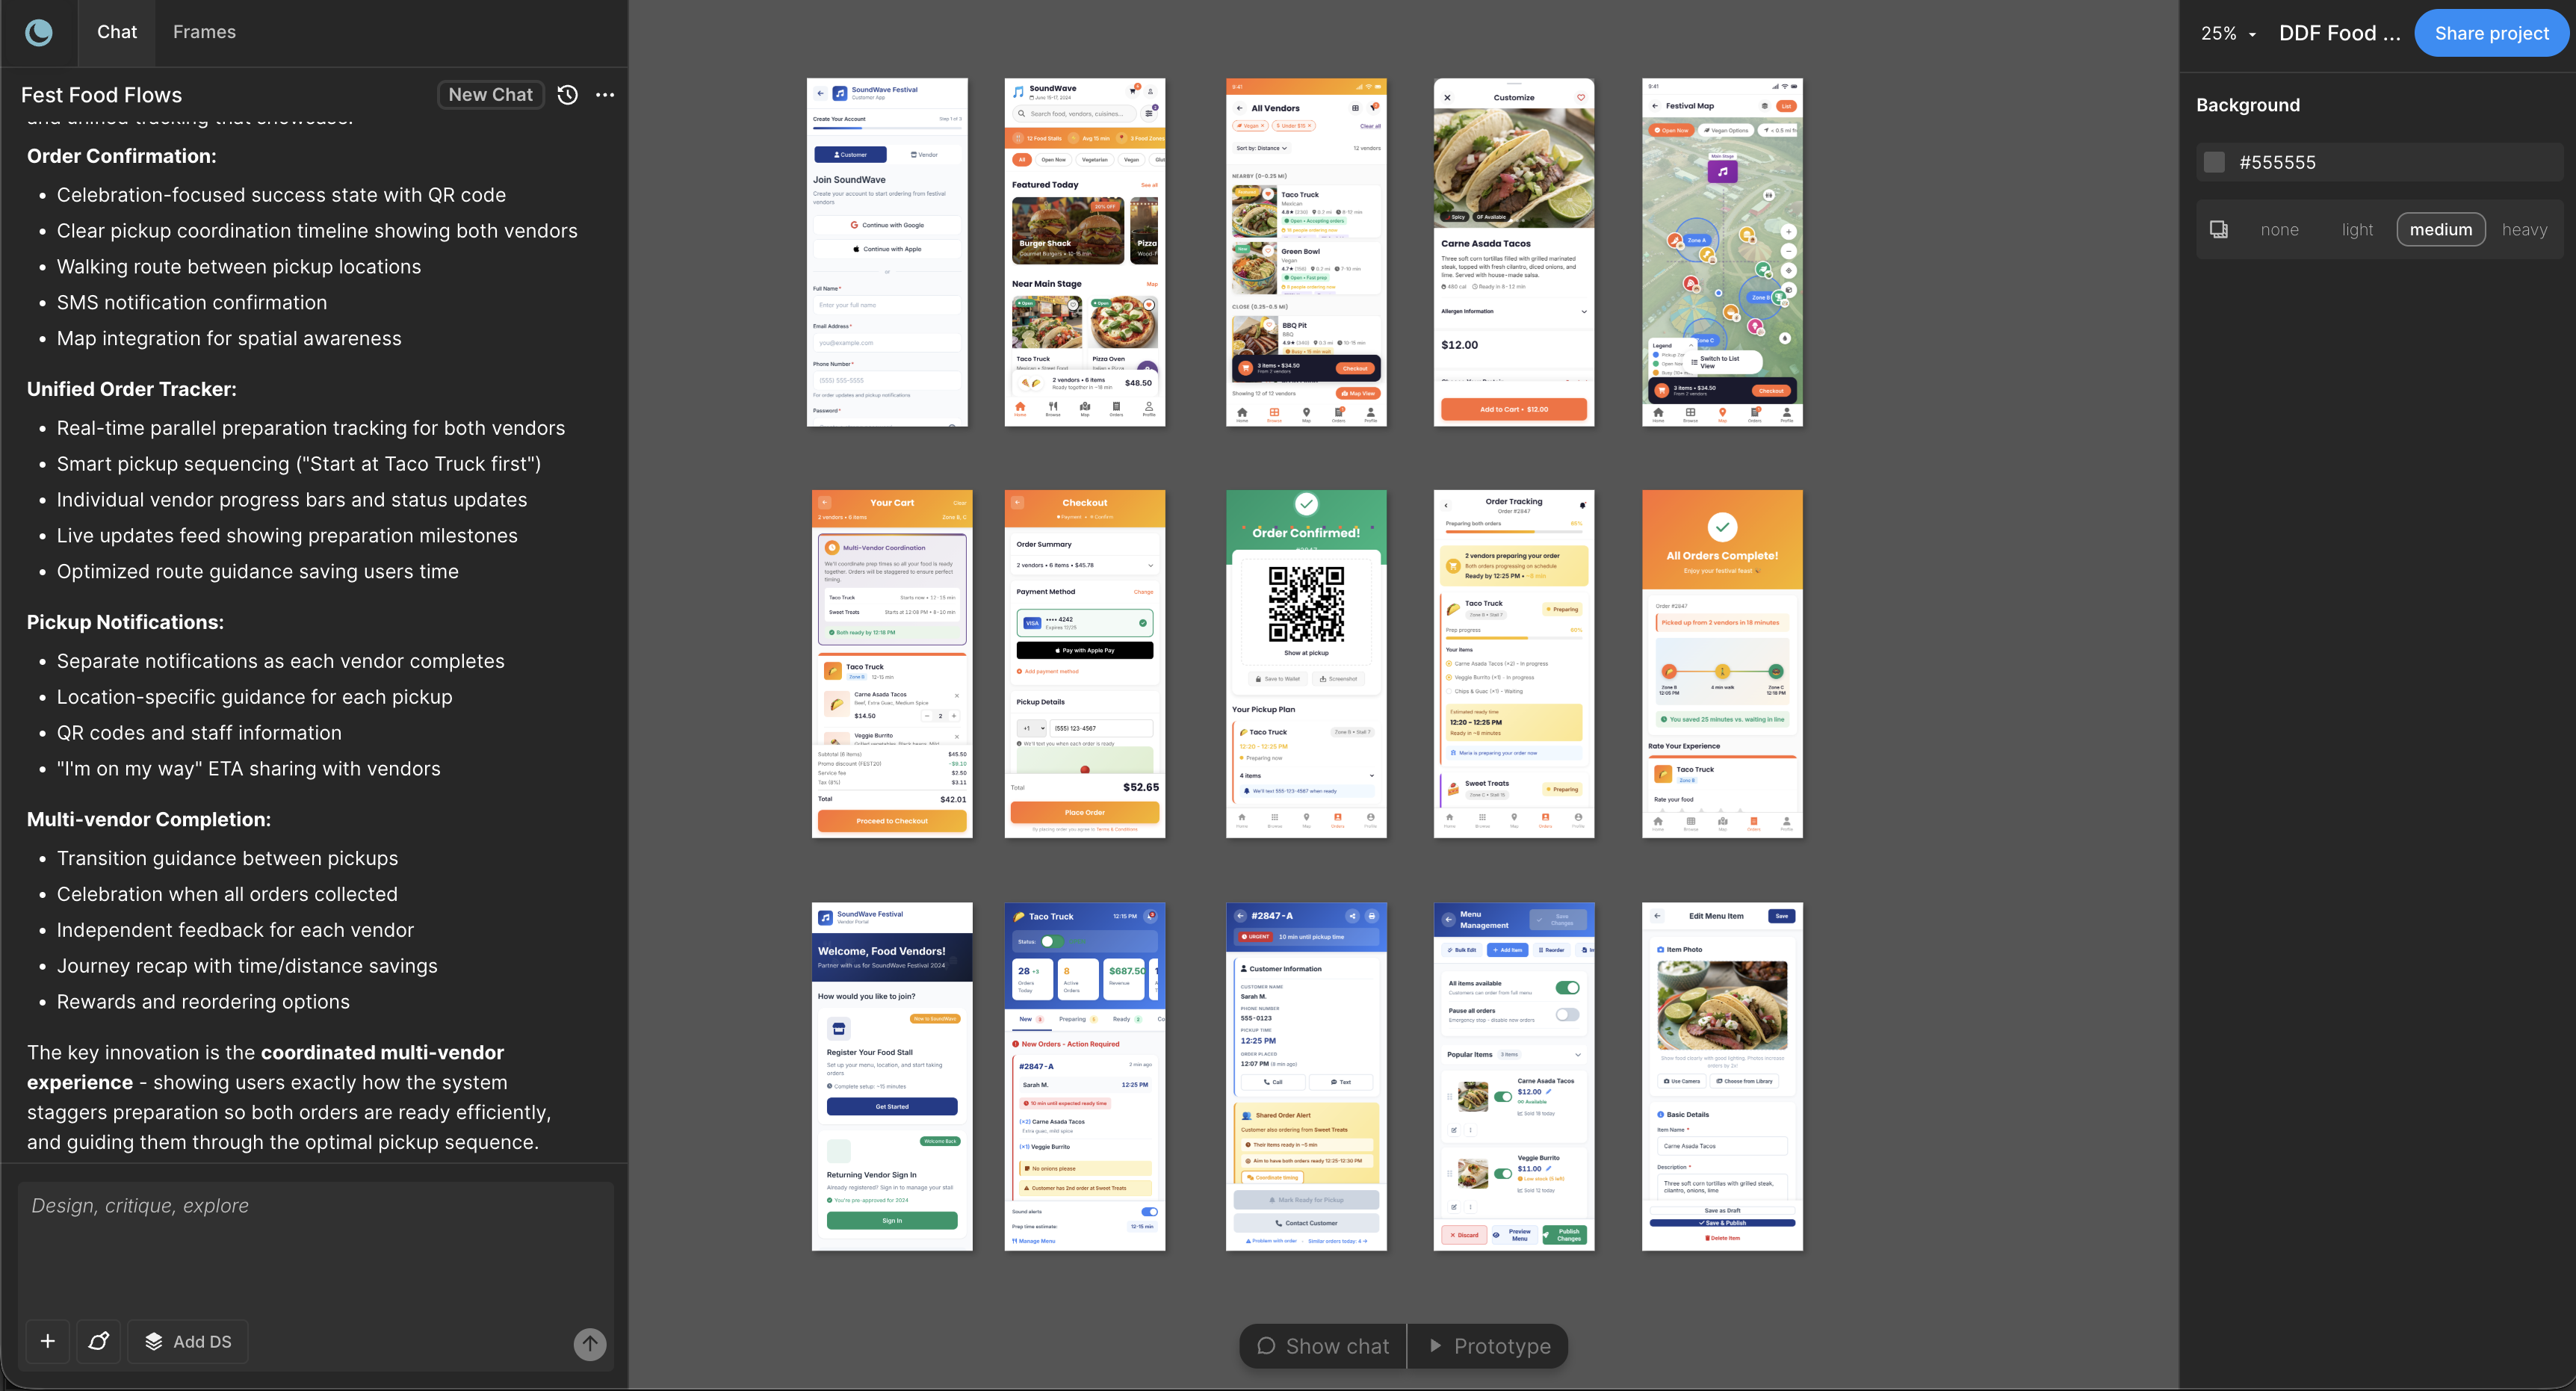
The system analyzes the description and produces a set of screens representing the steps in the flow. These screens typically appear connected as part of a visual sequence.
Review the generated screens to confirm that:
- The steps appear in the expected order
- Key interactions are represented
- The structure reflects the original requirements
Step 3: Review and refine with your team
Once the screens are generated, review the flow with designers, engineers, and other stakeholders.
Feedback may reveal areas where the layout should change or where additional states are needed. Updating the description and regenerating the screens can help refine the output.
After the structure of the flow is clear, the generated screens can be used as a starting point for further design work in tools such as Figma or other design environments.
What you're avoiding with this approach
Using generated UI flows can reduce the need to start interface design from a blank canvas.
Instead of reviewing written requirements alone, teams can examine a visual representation of the feature and discuss how the experience should function before detailed design begins.
This can make it easier to identify gaps in the flow or clarify ambiguous requirements earlier in the process.
Why this approach works better than traditional design-first workflows
In traditional workflows, designers interpret the PRD and build each screen manually before presenting them for review. This process can involve multiple rounds of feedback before the structure of the feature is finalized.
Generating an initial set of screens from the PRD provides a visual starting point. Designers can then focus on refining layout, interaction details, and visual polish rather than constructing every screen from scratch.
Common failures and how to prevent them
Failure 1: Your PRD has inconsistent screen descriptions
If some screens are described in detail while others are vague, the generated flow may reflect that imbalance. Reviewing the PRD beforehand and ensuring each step is clearly described can improve the results.
Failure 2: Your design system is incomplete
If the connected design system does not include certain component types needed for the flow — such as form fields or data tables — the generated screens may rely on default elements. Maintaining a comprehensive design system helps improve consistency.
Failure 3: State changes are not described
If the PRD only describes the main user path, the generated screens may not include states such as loading, error messages, or empty results. Including these scenarios in the description helps ensure they are represented in the flow.
What happens at the end of the process
At the end of this workflow, the team has a visual representation of the feature described in the PRD.
The generated screens illustrate the sequence of interactions and provide a shared reference point for discussion. Designers can refine the layouts further, and engineers can review the flow to understand how the feature is intended to function.
This process can help teams move from written requirements to visual exploration earlier in the product development cycle.
Try Moonchild
Want this for your team?
Bring your design system into Moonchild and let PMs, designers, and engineers ship on-brand UI together — without breaking consistency.
Written by
Steven SchkolneFounder of Moonchild AI. Building the AI-native platform for product design.
Related Articles
How to Turn a PRD into a Clickable Prototype Using AI in 2 Mins
Turn written product requirements into a clickable prototype in minutes using Moonchild AI. This guide walks through the workflow from PRD to interactive screens.
How PMs Can Generate UI Prototypes Without Designing
As a PM, you define requirements — but visualizing them usually depends on a designer. Here's how to generate interactive UI prototypes directly from written requirements using AI.
How to Prototype Product Ideas from a Single Prompt
You have a product idea but no time to write a full spec. Here's how to go from a single written prompt to a visual prototype using AI design tools like Moonchild.